Starting today, every Pinecone Assistant is now also an MCP server! Users can now connect their Assistant as a context tool in their agents and AI applications. This means that developers can now combine the simplicity of Assistant document processing, contextualization, and agentic-RAG with the simple integration and ecosystem of MCP.
Model Context Protocol (MCP) was released in November 2024 by Anthropic as an open standard that enables developers to build secure, two-way connections between their data sources and AI-powered applications. MCP follows a client-server architecture, where clients maintain connections with servers that expose specific capabilities through a standardized protocol.
In its initial launch, MCP was primarily directed toward local server implementations, quickly connecting services to MCP hosts like Claude and Cursor. MCP now includes remote connections to support agentic systems in production. This is significant because Remote MCP removes the complexity of running and managing MCP servers from the user, and moves the ownership to the provider. This means that integration becomes stateless and simple for developers.
Pinecone Assistant’s remote MCP server easily adds knowledge to your agents
We built a remote MCP server (following our local server) to support all existing and new AI assistants for production built with Pinecone Assistant. Users can now connect their assistants to their AI applications via MCP without the need to spin up Docker containers or set up server-side configurations.
Pinecone Assistant currently exposes Context API via MCP and we plan on exposing additional capabilities in following releases. Context API is the context engine behind Pinecone Assistant; it delivers structured context (i.e., a collection of the most relevant data for the input query) as a set of expanded chunks with relevancy scores and references. This makes it a powerful tool for agentic workflows, providing the necessary context to verify source data, prevent hallucinations, and identify the most relevant data for generating precise, reliable responses.

Connecting your agent to Pinecone Assistant’s remote MCP server
Let’s walk through a short demo showing you how to connect to Pinecone Assistant’s MCP remote server.
In this example we are going to 1) create an assistant 2) upload documents 3) connect Pinecone Assistant to your agent with MCP. This method can scale to thousands of documents and hundreds of queries per second.
You can read more about more advanced use in this Pinecone Assistant learn article.
First, let’s set up an Assistant and upload some documents:
# To use the Python SDK, install the plugin:
# pip install --upgrade pinecone pinecone-plugin-assistant

from io import BytesIO
from pinecone import Pinecone

PINECONE_API_KEY = "YOUR_API_KEY"

pc = Pinecone(api_key=PINECONE_API_KEY)

assistant_name = "mcp-example"

assistant = pc.assistant.create_assistant(
    assistant_name=assistant_name,
    instructions="Use American English for spelling and grammar.",
    region="us",
    timeout=30
)

text = "The secret number is 37"

assistant.upload_bytes_stream(
    stream=BytesIO(text.encode('utf-8')),
    file_name="secret.txt",
    timeout=None
)
Your MCP url is simply:
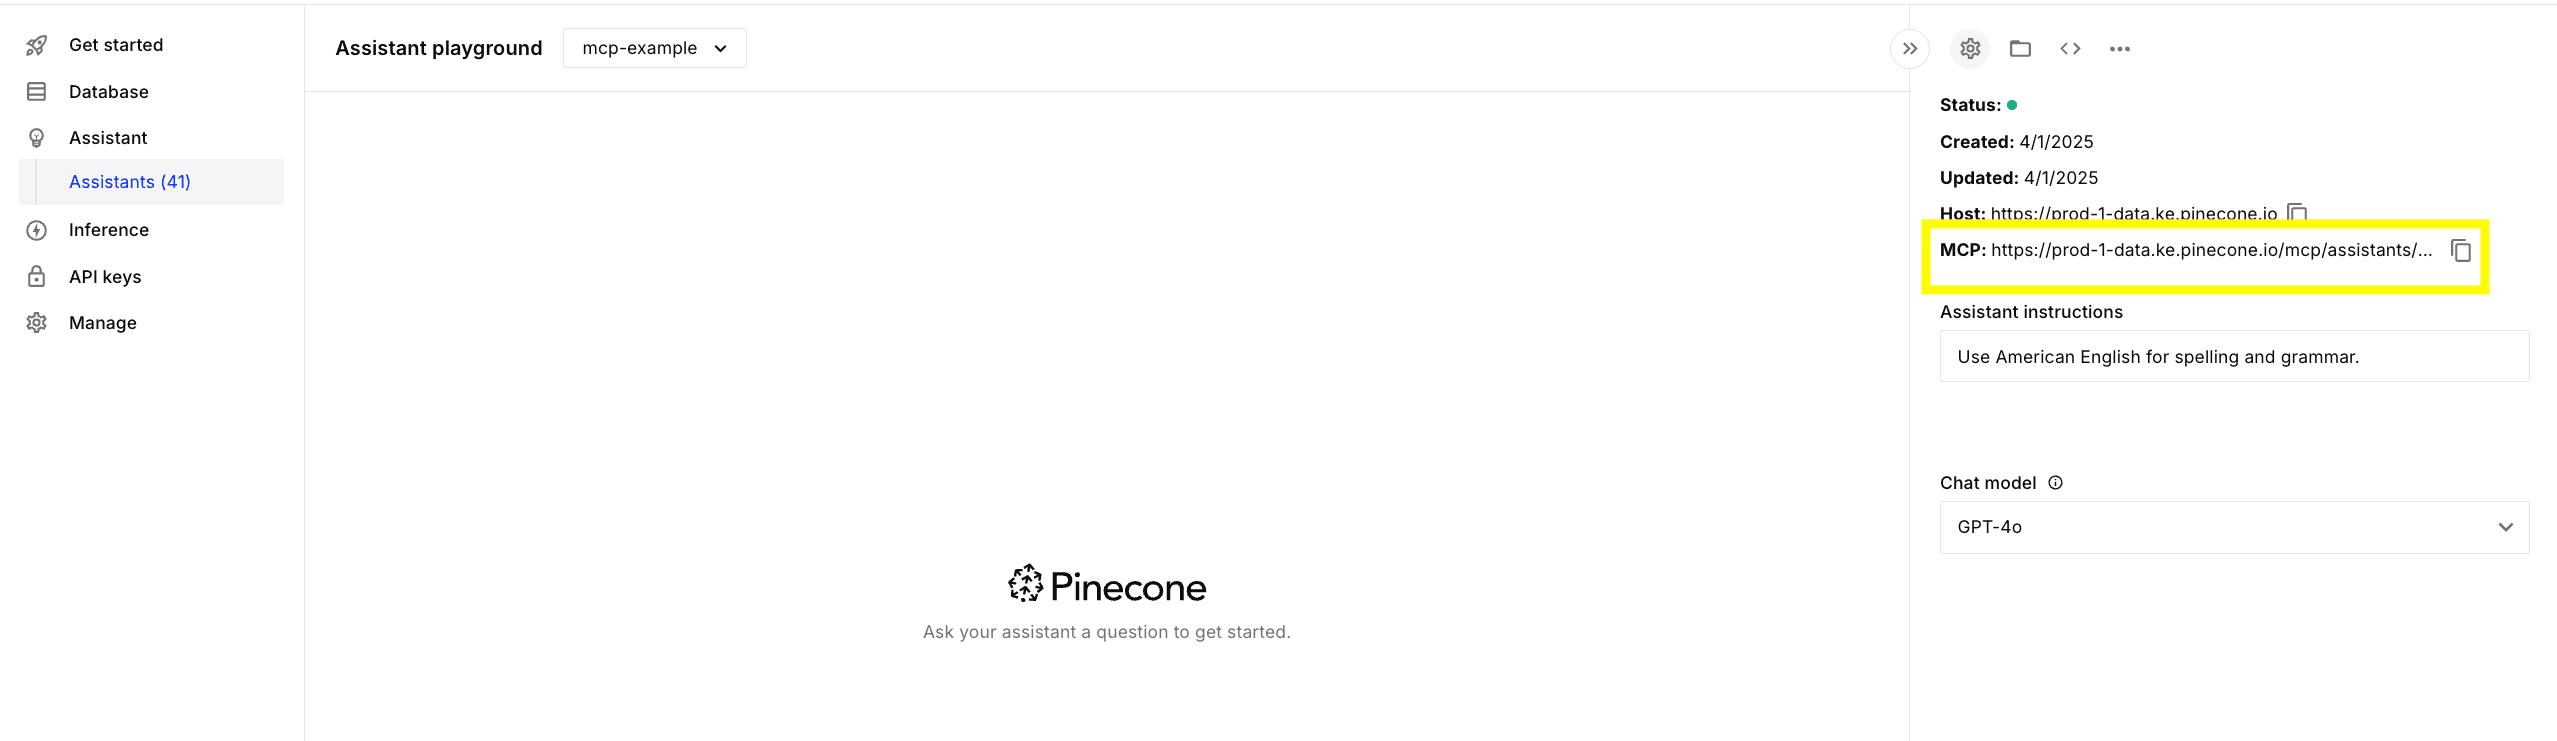
assistant_host = assistant.host
mcp_endpoint = f"{assistant_host}/mcp/assistants/{assistant_name}/sse"
You can also find the MCP endpoint on the Assistant page in the Pinecone console:
Now let’s create a simple agent using Langchain:
from langchain_mcp_adapters.client import MultiServerMCPClient
from langgraph.prebuilt import create_react_agent

from langchain_anthropic import ChatAnthropic

model = ChatAnthropic(model_name="claude-3-7-sonnet-latest", api_key='ANTHROPIC_API_KEY'

async with MultiServerMCPClient(
    {
        "pinecone_assistant": {
            "url": mcp_endpoint,
            "transport": "sse",
            "headers": {
                "Authorization": f"Bearer {PINECONE_API_KEY}"
            }
        }
    }
) as client:
    agent = create_react_agent(model, client.get_tools())

    response = await agent.ainvoke({"messages": "What is the secret number?"})
    print(response["messages"][-1].content)
    # According to the information in the knowledge base, the secret number is 37.
Use with Claude Desktop
At this early stage of remote MCP server adoption, the Claude Desktop application does not directly support remote servers: “Why Claude for Desktop and not Claude.ai? Because servers are locally run, MCP currently only supports desktop hosts. Remote hosts are in active development.” As soon as the protocol matures and remote servers are supported as first‑class citizens, you’ll be able to integrate your assistants seamlessly into web applications, such as Claude.ai, a capability that local MCPs simply cannot provide.
However, you can configure Claude Desktop to use Pinecone Assistant’s remote MCP server with a workaround. We demonstrate this in the example below, where we use a local proxy server, supergateway, to forward requests to the remote MCP server with your API key. (Note: supergateway is an open-source third-party tool. Use at your own risk.)
1. Install Claude Desktop
2. Open Claude Desktop and go to Settings
3. On the Developer tab, click Edit Config to open the configuration file.
4. Add the following configuration:
{
  "mcpServers": {
    "Assistant over supergateway": {
      "command": "npx",
      "args": [
        "-y",
        "supergateway",
        "--sse",
        "https://<YOUR_PINECONE_ASSISTANT_HOST>/mcp/assistants/<YOUR_ASSISTANT_ID>/sse",
        "--header",
        "Authorization: Bearer <YOUR_PINECONE_API_KEY>"
      ]
    }
  }
}
Replace <YOUR_PINECONE_API_KEY> with your Pinecone API key and <YOUR_PINECONE_ASSISTANT_HOST> with your Pinecone Assistant host.
5. Save the configuration file and restart Claude Desktop.
6. From the new chat screen, you should see a hammer (MCP) icon appear with the new MCP server available.
Get going with Pinecone Assistant MCP remote server
Review our simple documentation and start adding knowledge to your agentic workflows with our Pinecone Assistant remote MCP implementation today.
And feel free to contact us and let us know what other capabilities you want exposed via MCP.